Popular Posts
May 18, 2010
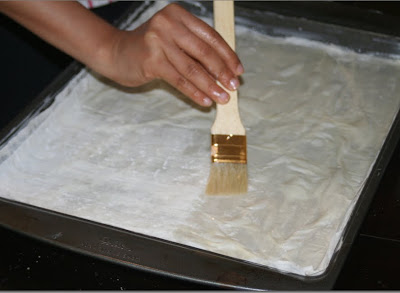
Baklava - a Mediterranean delight
Jun 19, 2008
Sweet puff - Coconut filling

Cardamom powder - 1 teaspoon

Method:
Thaw the puff pastry sheets and the shredded coconut if you are using frozen.
Prepare the filling:
Cobine coconut, sugar and jaggery/brown sugar and a tablespoon of water and heat in a heavy bottomed kadai.
Keep in low to medium heat.
Keep stirring. You will notice that the consistency will loosen. But, after around 15 minutes, it will start thickening.
Mix in the cardamom powder.
Take off from heat when the consistency is thick at the same time a little moist too.
(Don't wait until all the moisture is absorbed).
Keep it aside and wait until it comes to room temperature.
Making the sweet puffs:
Cut the pastry sheet into three parts. Make use of the folding. Then cut each part into two. There will be totally 6 small rectangles.
(Keep the unused portion of the pastry sheet in the fridge not in the freezer)
Preheat oven to 375 degrees.
 Take a tablespoon of the filling and place it in one side of the rectangle so that you can close the filling.
 Close the filling and seal the sides. A drop of water can be used to seal.
Use a fork to make a design.
Repeat this for all the puffs.
Poke once on the top of each puff to vent.
Line the six puffs in a non stick baking tray.
Bake for approximately 25 minutes or until the surface is golden brown.
Take it out and cool completely before you taste. The filling will be really hot.
If the puffs are not sealed proplerly, there will be a leak. Discard the leaked filling on the tray.
Enjoy the sweet and delicious puffs. You can as well shout 'Bam' like Emeril and sprinkle powdered sugar on the puffs before serving.
Repeat these steps for the remaining pastry sheets and the coconut filling too. Thaw the pastry sheets before proceeding.
This is my entry to AFAM - Coconut hosted by Suganya of Tasty palletes. Thanks suganya for hosting this event.
Apr 1, 2008
Nankatai - Indian Biscuit

Grind the sugar and transfer it to a large mixing bowl.

Note: More flour will make the nankatais more crunchy and they crack when baked. More shortening will make the nankatais more fragile and will break when touched. Perfect nankatais are not too crunchy and do not break when touched and has a light golden color in the bottom.
Dec 27, 2007
Eggless Tutti Fruity Cookies


2 cups Maida
1 cup Canola oil (refined oil)
1 cup powdered sugar
1/2 cup custard powder (I used vanilla flavor)
3/4 teaspoon baking powder
1/2 teaspoon baking soda
2 teaspoons Cardamom Extract
Method:
Dec 20, 2007
Eggless Butter Cookies


Dec 30, 2006
Eggless Banana Nut Muffins

One of my most favorite Muffins, which I think is the King of all Muffins, is the ‘Banana Nut Muffin’. I just can’t believe that I made the Eggless version of these Muffins right in my Kitchen. They came of really well. Very soft and Fluffy. These Muffins filled the Room with the Banana Flavor. The Ingredients part of the Recipe I followed Saffron Hut’s recipe for Banana Nut Muffins. I am really thankful to her for sharing the wonderful Recipe. Here is how I made the Muffins.
Ingredients:
For 12 Muffins:
Ripe Bananas - 4
Sugar – ¾ Cup
Melted Unsalted Butter – 1/3 Cup
Baking Powder – 1 teaspoon
Baking Soda – 1 teaspoon
All Purpose Flour – 1 ½ Cups
Half Cup Walnuts – Finely Chopped
Method:
Preheat Oven to 375 degrees F.
Line the Muffin Pan with the Muffin Liner Paper Cups.
Mash the Bananas in a medium size bowl.
Add the Melted Butter and Mix well using a Rubber Spatula.
Add in the Sugar and Stir well. Keep this Bowl aside.
Take another Bowl, preferably Large. Add the Flour. Mix in the Baking Powder and Baking Soda using a Whisk.
Make a well in the Center of the Flour and Pour in the Prepared Banana Mix in the Middle and Stir using the same Rubber Spatula. Do not over mix. The Flour must get moistened. Mix well only for a minute or two. Do not use any kind of Electric Hand Mixers.
Keep aside 1 tablespoon of Finely Chopped Walnuts and stir in the remaining nuts in the batter.
Fill ¾ of the Muffin Cups. Use a Spoon to fill the Cups.
Sprinkle the remaining nuts on top.
Bake it in the Oven for about 35 minutes approximately, until the Muffins are golden brown.
Cool off the Muffins completely before serving.
Nov 26, 2006
Saffron Walnut Eggless Cake

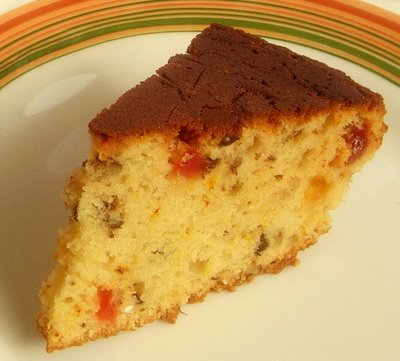
This is one of my most Favorite Food. Being Vegetarian, I miss out a lot of Baking, But trying out various recipes that do not call for Eggs. (I do not prefer Egg substitutes). This is a Wonderful, Very Simple and Tasty Recipe for an Eggless Cake. Since I love Saffron and Walnuts, I have added it to the Cake and that's 'Saffron Walnut Eggless Cake'. Hmm…. simply delicious. A bite of the Brown Crest combined with the Soft Inner Texture…. Tastes really good when served with hot Coffee in the morning. Hey, this Cake is not just for the morning hours. I munch this delight any time of the day. Here is the recipe.
2 cups Maida Flour
1/3 cup Butter
1/2 cup Powdered Sugar
1/2 can of Sweetened Condensed milk
1/2 tsp baking soda
1 tsp baking powder
1/2 tsp vanilla essence
a pinch of yellow/lemon color powder
Water as needed
1 Cup Chopped Walnuts
3-Tablespoon Tutty FruitySaffron, 1 teaspoon
Milk – 1 tablespoon
Add Saffron to Milk and stir. Keep it aside.

Method:
To the Maida Flour, add the baking powder, baking soda, and vanilla essence. Mix well using a dry Whisk. Keep it aside.
Put melted Butter in a bowl and add Powdered Sugar and using a Whisk or an Electric (Hand) Mixer, mix thoroughly.
Add Condensed milk and mix really well.
Add Maida in one thirds and mix gently (I mean, without using any motorized mixer) and beat unto a cake-like batter. While mixing the Flour, if the Consistency is tight, add little water and mix manually (Not using an Electric Mixer). When all the flour is well incorporated, Using an Electric Mixer, Mix for 3 to 4 minutes. You can still mix using a Whisk if you don't have an Electric (Hand) mixer.
Add the Tutty Fruity, Nuts and Saffron Milk Mixture, Color Powder and Mix gently.
Pour the mixture into a greased cake pan and bake it in preheated oven at 360 F for Approximately 35 to 40 minutes.
Use a Skewer to see if the Cake is done. When inserted into the Cake, and if nothing is clinging to the skewer and the Cake has a golden color crest on the top, it means the Cake is done.
Take it out from the Oven and let it cool down for 10 minutes and toss the cake upside down and let cool completely. Slice and Serve. Do frosting and Icing if you prefer.
NOTE:
Do not grease too much as it will form a thick brown crest even before the cake is fully done.
If using a Motorized Mixer, Mix the batter only in one direction. If it is a double blade mixer, remove one blade. This will incorporate more air in the batter.
Do not level the cake, If the consistency is right this will not be needed.


